Welcome to mac4xp’s blog:
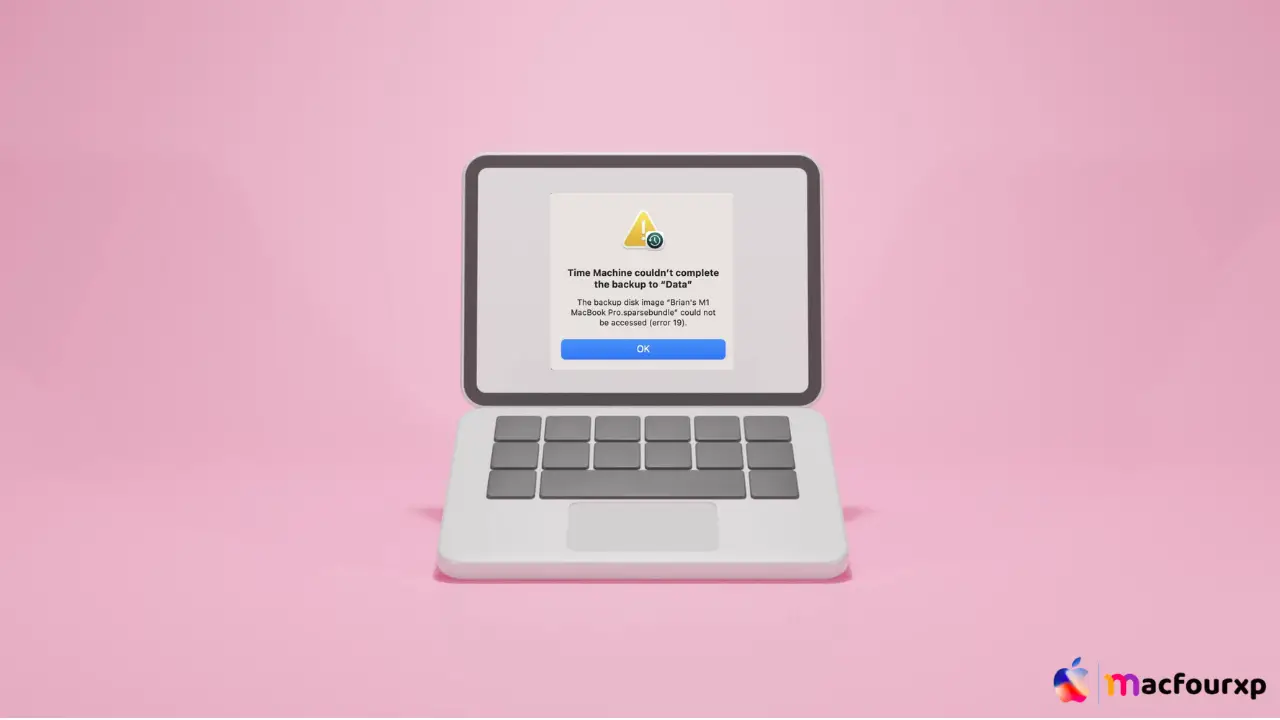
“the backup disk image could not be accessed (error 19)”
“Time Machine couldn t complete the backup to TimeMachineBackup”
“Time Machine could not delete the backup disk image”
“Time Machine could not access the disk image to retrieve information”
“Synology Time Machine backup disk image could not be created”
“The disk image sparsebundle is in use”
“time machine must erase your existing backup history and start a new backup to correct this.”
“How to fix time machine backup error 19, 16, and 112”
“How to fix time machine error 112 apple watch”
“Time Machine System restore stuck on select a destination”
if you are also searching for similar queries on the web, then this article is for you. we are going to show you how to fix “the backup disk image could not be accessed error 19 on Mac” in this post.
Are you also getting a “Time Machine could not access the backup disk image MacBook Pro sparsebundleerror 19, 16, 112” while doing a backup on your macbook?
This error usually pops up when trying to use or create a Time Machine backup. Error number 19 usually shows that there are some permission issues regarding a particular file, to which Time Machine is unable to back up the file. Also, error message 16 may indicate a network problem or an issue connecting to the backup disk.
However, error code 112 refer that the backup disk has been corrupted and lacks enough space for all backups. All these errors belong to Time machines. You can fix your Time Machine backup by following these simple steps:
Why does the Time Machine back up error 19 occur?
Time Machine error occurs due to many reasons, some of which are:
- Corrupted File: Sometimes, the backup file itself can become corrupted, making it impossible for the Time Machine to reach your saved data.
- Permission: If the permissions of your backup disk or folder are wrong, Time Machine may not have an “access key” to use it.
- A Full Disk: Due to error 19, your backup disk can’t create new backups if it’s entirely occupied.
Here are 6 solutions to fix ” Time Machine Backup Error 19″:
Check Your Connection:
First things first, make sure everything is plugged into your macbook properly.
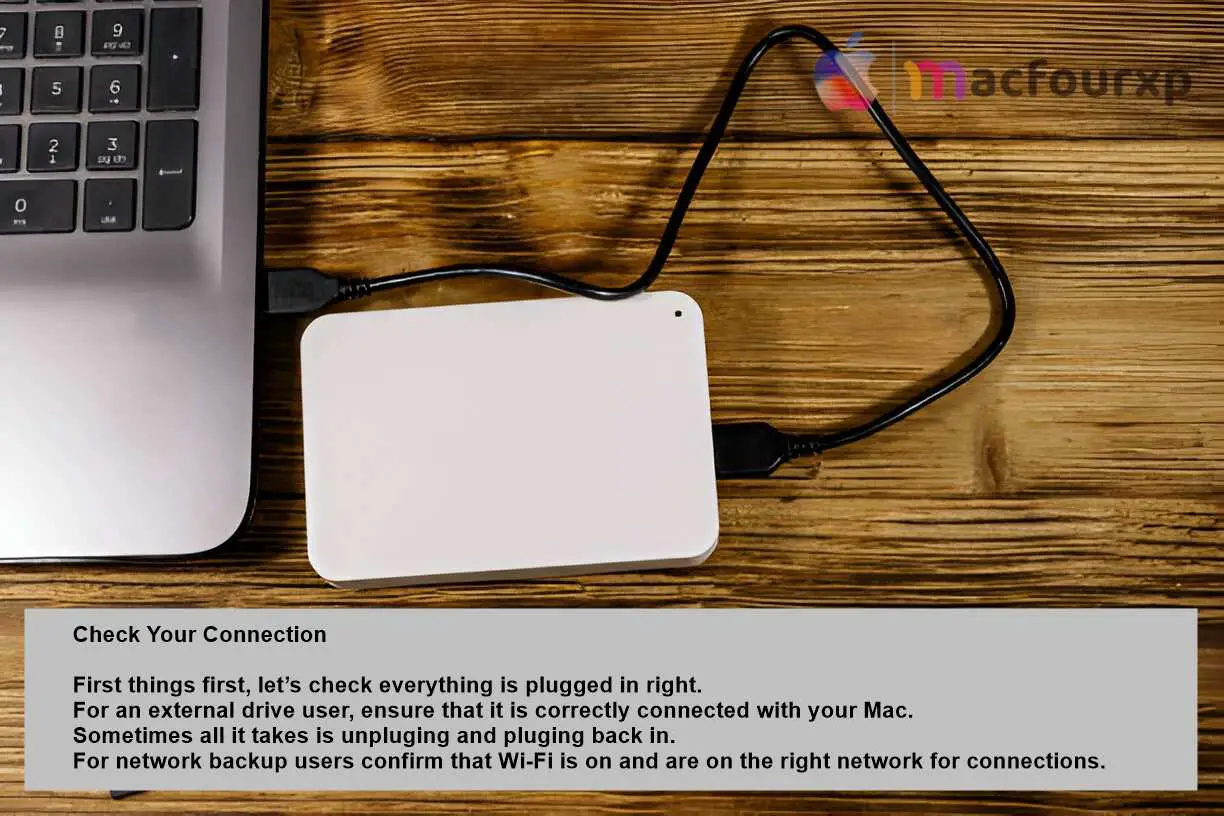
- For an external drive user, ensure that it is correctly connected to your Mac.
- Sometimes all it takes is unpluging and pluging back in.
- For network backup users confirm that Wi-Fi is on and are on the right network for connections.
Restart your Mac:
You can sometimes fix almost half of the issue by restarting your mac.

- Click on the Apple menu in top-left corner of your screen.
- Then select “Restart” and wait until it boots again.
- Try again after coming back, maybe the error has gone away?
Update your macOS and Application:
If you are currently running old Macos and outdated software on your MacBook, then this can also be a reason for the occurrence of Time Machine Backup Error 19.
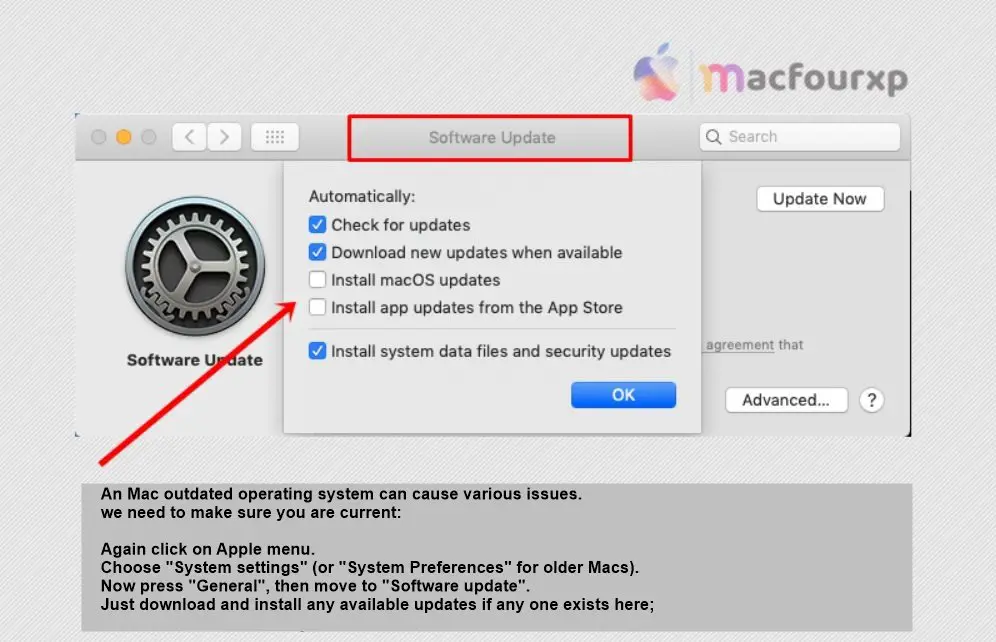
- Again, click on the Apple menu.
- Choose “System settings” (or “System Preferences” for older Macs).
- Now press “General”, then move to “Software update”.
- Just download and install any available updates if anyone exists here;
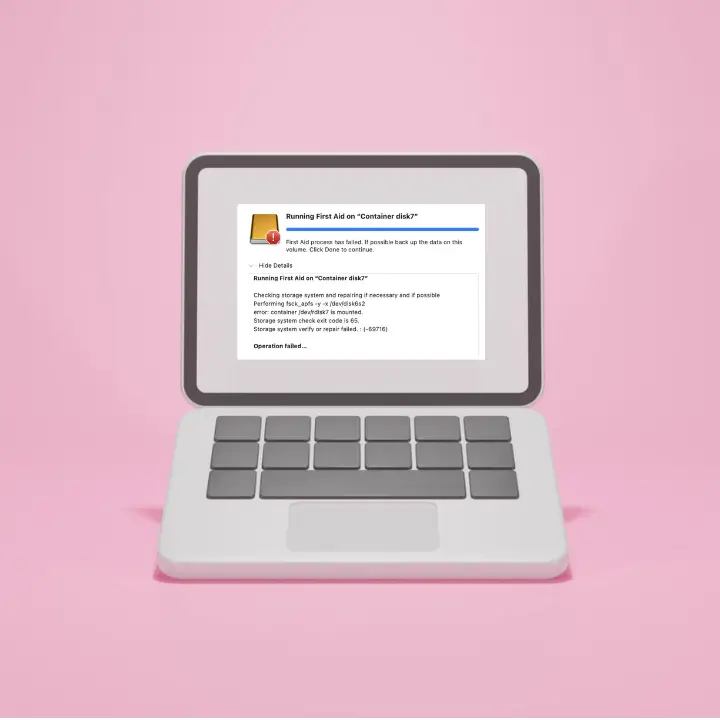
Repair Your Backup Disk :
If you are still getting Time Machine error 19 after trying all the solutions above, then you may need to give your disk some love. Now You need to repair your backup disk once with First Aid tool. First Aid tool fixes the disk 9 out of 10 times.
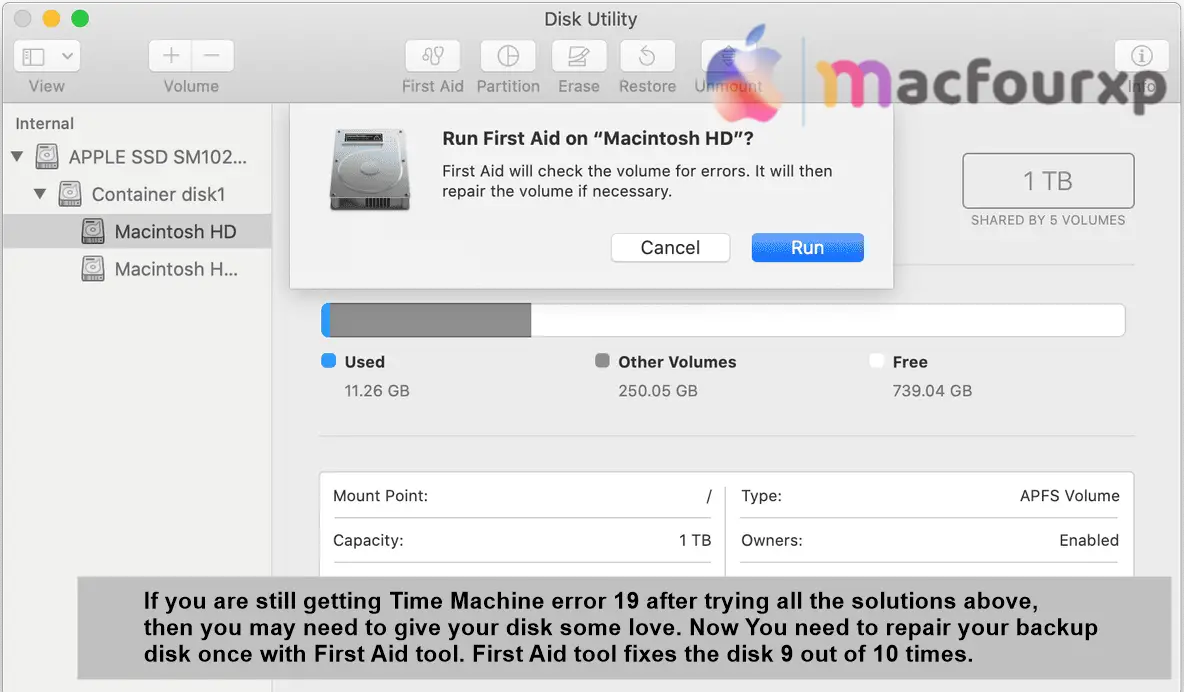
- Open “Disk Utility” (you can find this using Spotlight search).
- Select your Backup Drive from the list on left side of window’s pane.
- Click First Aid button at top window menu bar.
- Follow all instructions indicated by dialogue boxes for verification and repair disk runs;
Recreate the Sparsebundle :
Still getting Time machine backup errors? Let’s try from scratch.
- Open “Terminal” (you can find this in Applications→Utilities).
- Now type “hdiutil compact /path/to/your/sparsebundle.sparsebundle” in the command line.
- (Remember to replace “/path/to/your/” with the actual location of your sparsebundle)
- Then Press “Return” and let it work.
Create a New Backup:
Sometimes it is best to start over if all else fails.
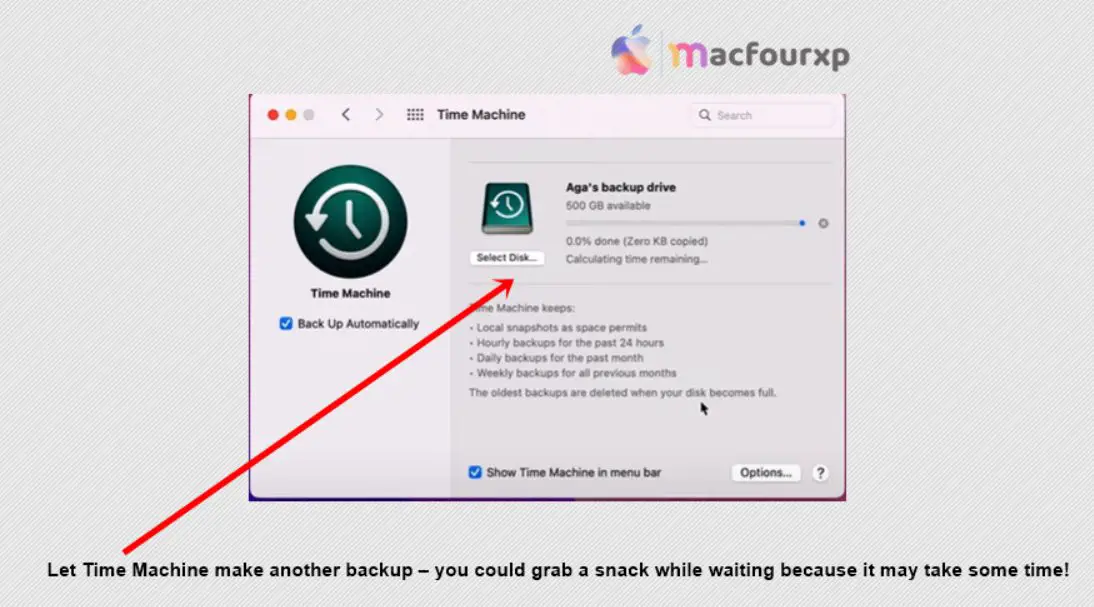
- Open Time Machine preferences (you can find this in System Settings).
- Choose “Select Backup Disk”.
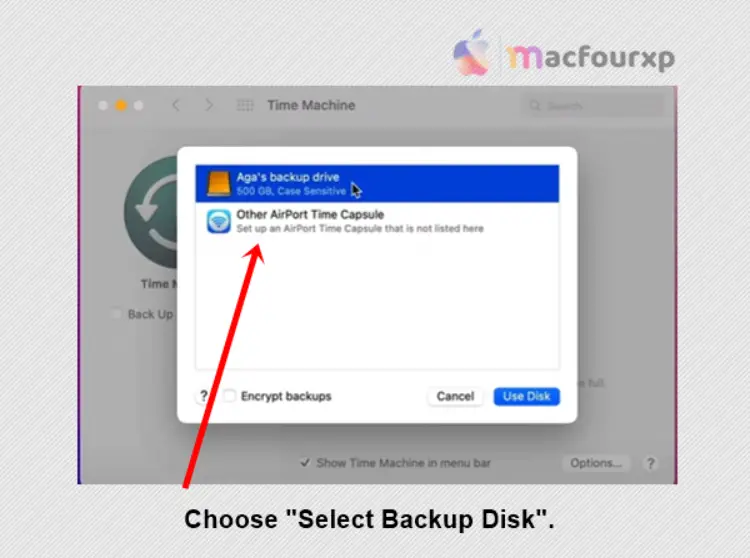
- Select your backup disk or add a new one if you are just starting out.
- Click on Use Disk.
- Take a break while Time Machine makes another backup, you might need a snack while waiting.
Final Thoughts
These 6 solution steps should be able to help you fix that annoying “The backup disk image could not be accessed (error 19)” Don’t give up because backups are really important. If all these steps didn’t work, then you should call Apple Support..
NEXT READ THIS:
How do I Fix Macbook trackpad not working after update
How do I Fix “USB Accessories Disabled” Error (6 Ways)
Fixed : ServiceRecords will Damage your Computer Popup Alert