Welcome to mac4xp’s blog:
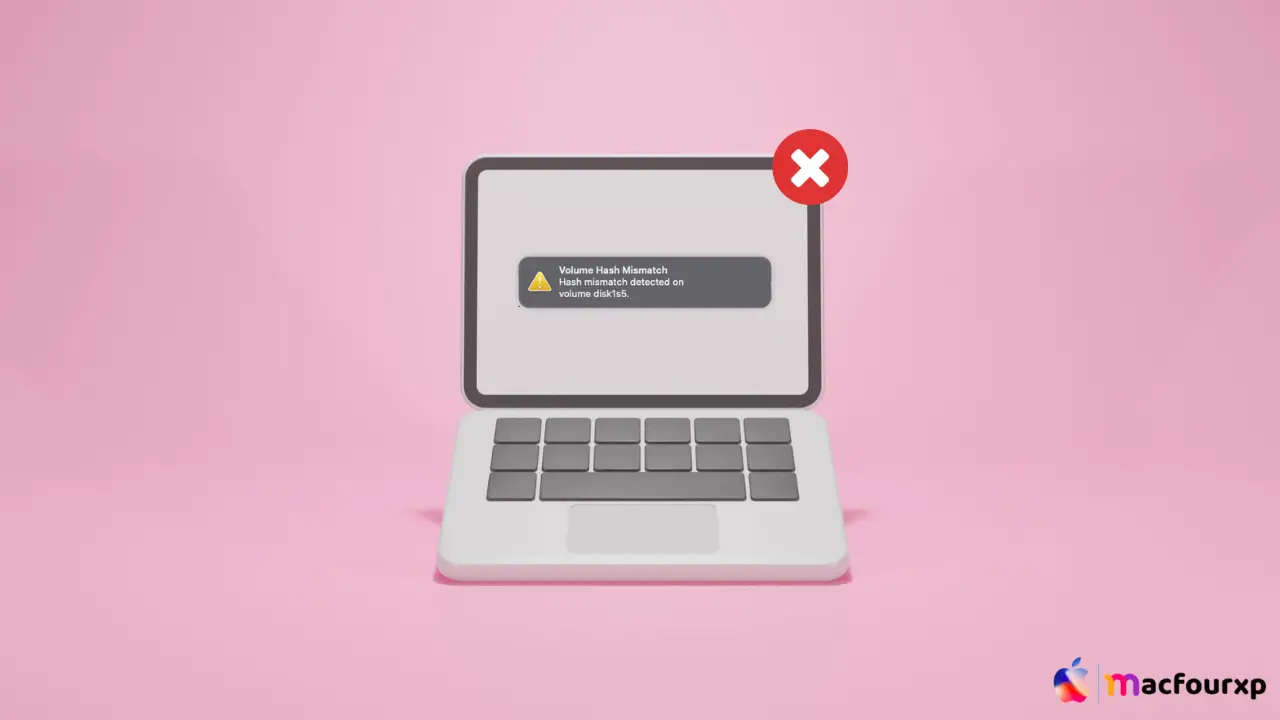
“Volume Hash mismatch Ventura”
“Volume Hash mismatch disk1s5”
“Volume Hash mismatch disk1s1”
“Volume Hash Mismatch hackintosh”
“Fix volume hash mismatch error on mac reddit”
“Volume Hash Mismatch detected on volume disk2s5”
if you are also searching for similar queries on web, then this article is for you. we are going to show you how to fix “Volume Hash Mismatch” Error on Mac” in this post.
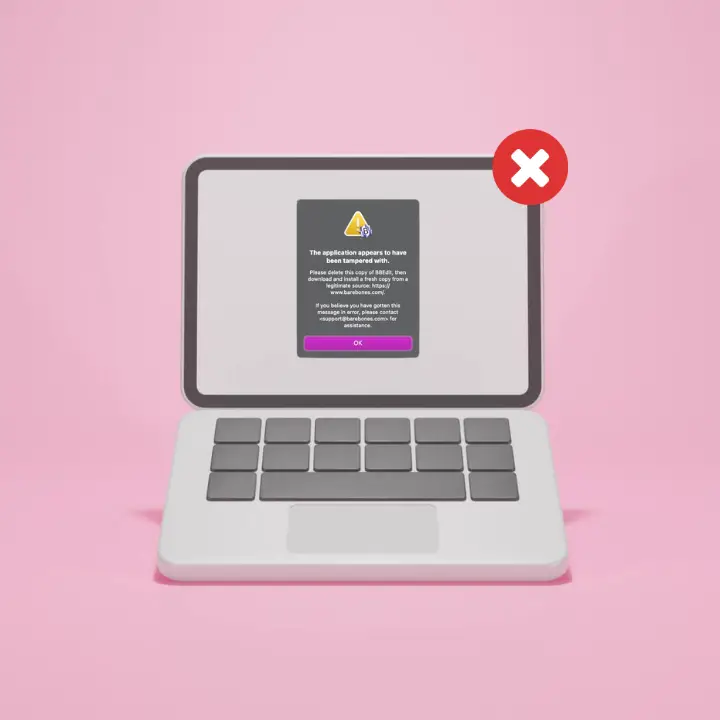
The “Volume Hash Mismatch” error message can be an annoying moment when trying to boot your Mac or access some important files. The error usually occurs where the data on the startup disk of your Mac does not match the hash value stored in memory,
and there is a wide range of reasons that may lead to this discrepancy such as hardware problems, software destruction or even interrupted system updates. However, there are several ways to Fix this situation so that you can use your Macbook again:
What is the cause of the error “ “Volume Hash Mismatch””
You get this error code when macOS detects a discrepancy between your expected and actual hash values. A hash is a unique digital fingerprint used to verify data integrity. Any mismatch could imply probable data corruption or inconsistencies within the volume. Here are some possibilities:
- Unexpected System Shutdown: Sudden shutdowns or power outages can lead to incomplete written operations and corrupt file system structures, triggering a hash mismatch error.
- Disk Errors: disk errors on your storage drive can cause data inconsistencies, leading to hash mismatches.
- Outdated macOS Version: Outdated versions of macOS may be incompatible with newer storage formats or file systems causing hash verification failures.
- Hardware Issues (Less Likely): In rare cases, physical hardware malfunctions within the storage drive can contribute to data corruption and hash mismatches.
Here are 6 solution to fix “Volume Hash Mismatch” on Mac:
Restart Your Computer :
Sometimes simply restarting will resolve the temporary hiccups responsible for these problems.
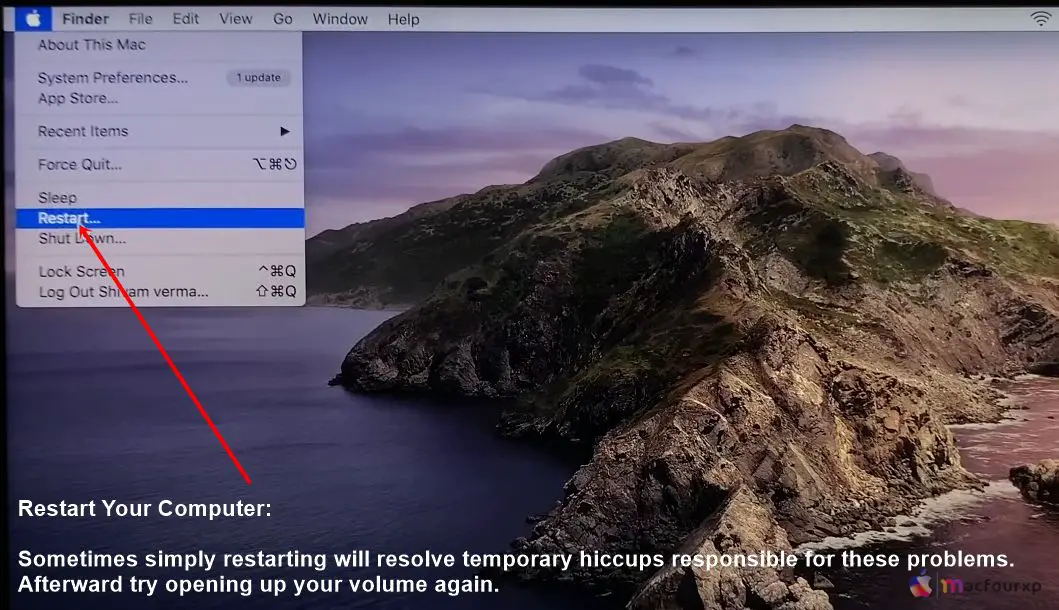
- Afterwards, try opening up your volume again.
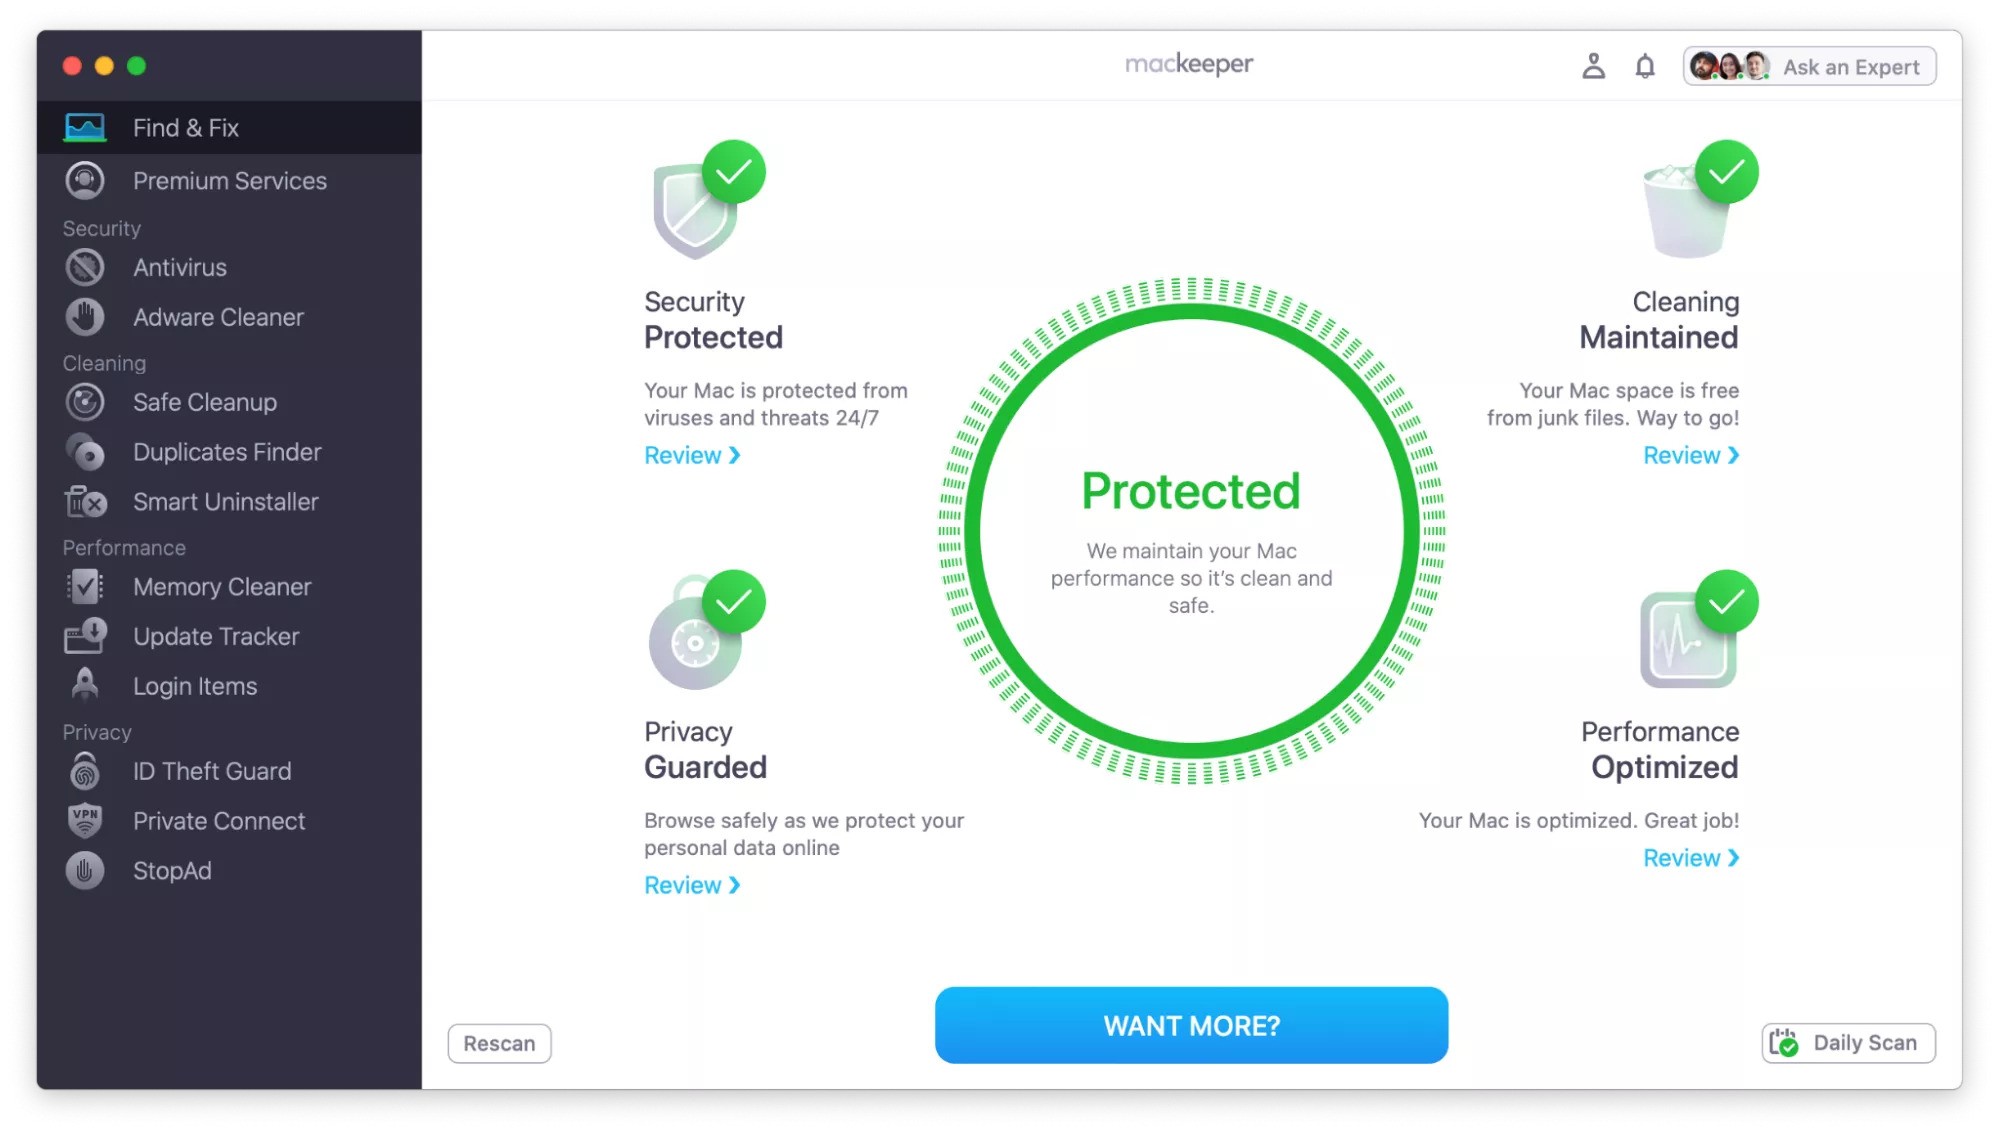
Verify Disk Permissions :
Occasionally incorrect file system permissions can result in hash mismatch errors. Here’s how you can check permissions using Disk Utility:
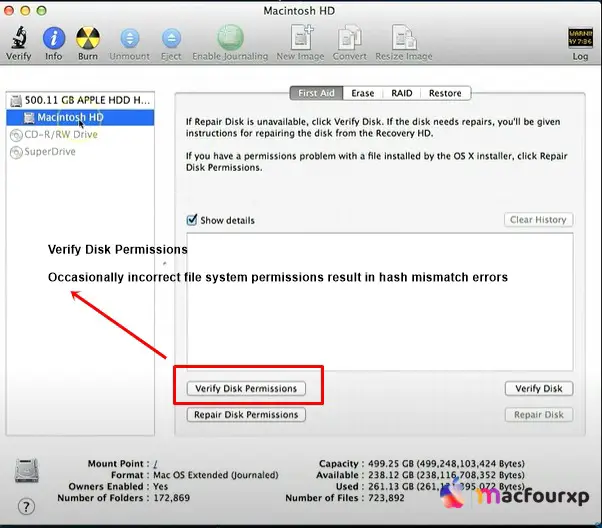
- Launch Disk Utility (Applications > Utilities).
- On the left-hand panel, select your primary drive.
- Click on the First Aid tab.
- Then click Repair Disk Permissions.
Run Disk Utility First Aid :
Disk Utility has a built-in First Aid feature which allows locating probable disk errors contributing to this kind of hashing fault.
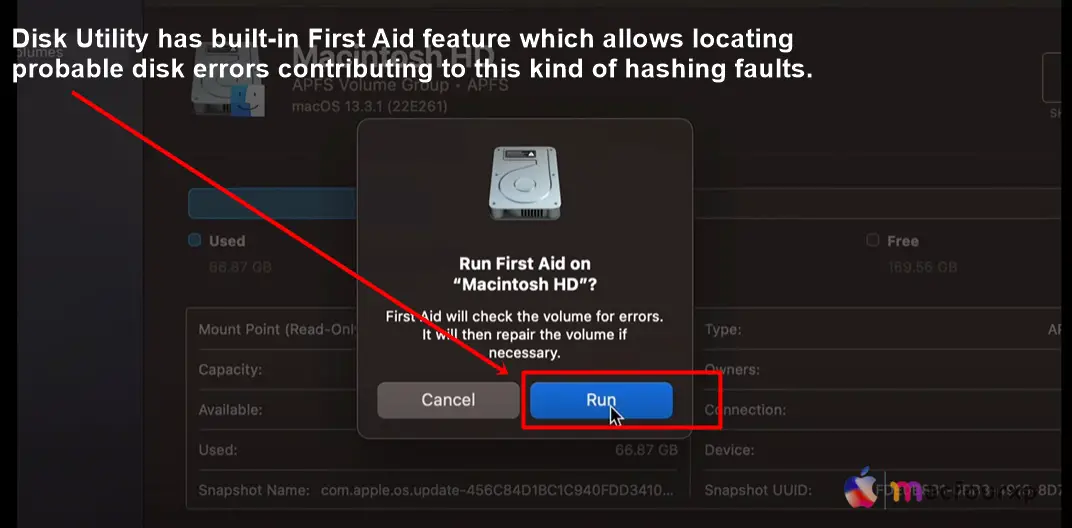
- Open Disk Utility (Applications > Utilities).
- On the left-hand panel select your primary drive.
- Click on the First Aid tab.
- Then click Run. This performs a basic check and repair of the disk.
Reset SMC and NVRAM :
System Management Controller (SMC) and Parameter RAM (PRAM)/Non-Volatile RAM (NVRAM) controls a lot of hardware, like fans, power, and disk drives. Resetting them might just work:
Note: This step applies only to Intel-based Macbooks, Apple Silicon (M1, M2) Macbooks that don’t utilize PRAM/NVRAM.
Resetting SMC :
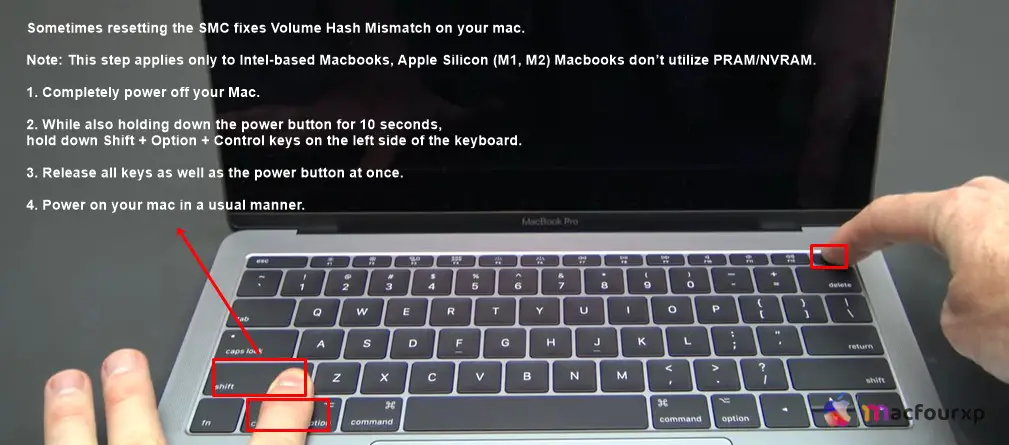
- Completely power off your Mac.
- While also holding down the power button for 10 seconds, hold down Shift + Option + Control keys on the left side of the keyboard.
- Release all keys as well as the power button at once.
- Power on your mac in a normal manner.
Resetting PRAM/NVRAM :
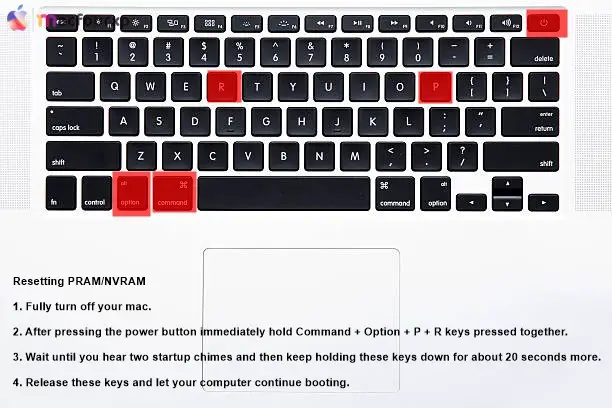
- Fully turn off your mac.
- After pressing the power button immediately hold Command + Option + P + R keys pressed together.
- Wait until you hear two startup chimes and then keep holding these keys down for about 20 seconds more.
- Release these keys and let your computer continue booting.
Downgrade macOS (Recent Upgrades) :
If you have recently upgraded your macOS, it is possible that this error occurred. Downgrading can fix compatibility problems with new file system formats.
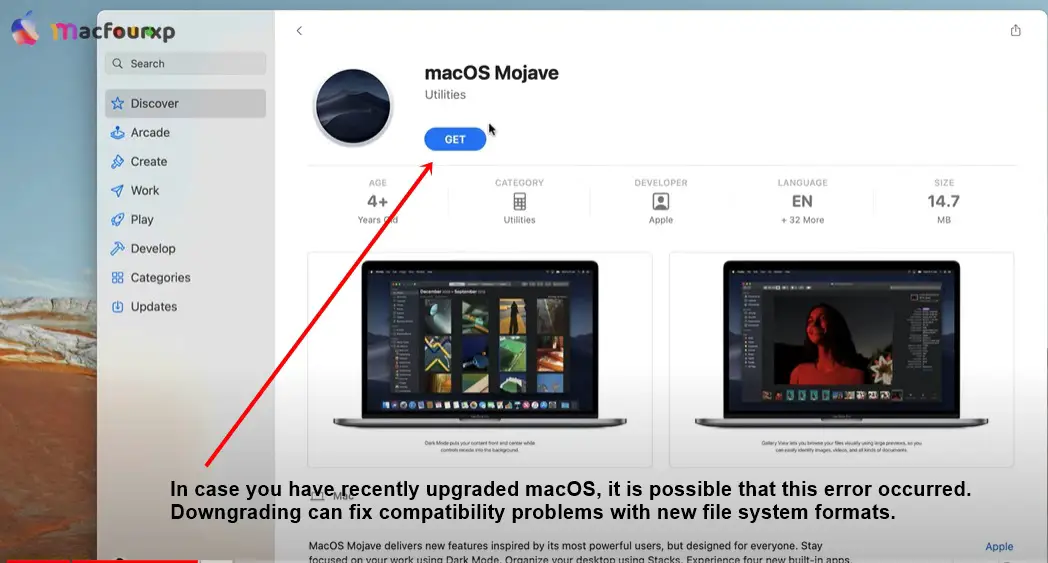
- Note: For downgrading you must have made a Time machine back up before upgrading.
Erasing Your Mac Disk :
This is a sensitive option to remove all data from the drive. But it may also be necessary to erase and reformat the disk in case other alternatives are not effective. Ensure you have made a backup of your data.
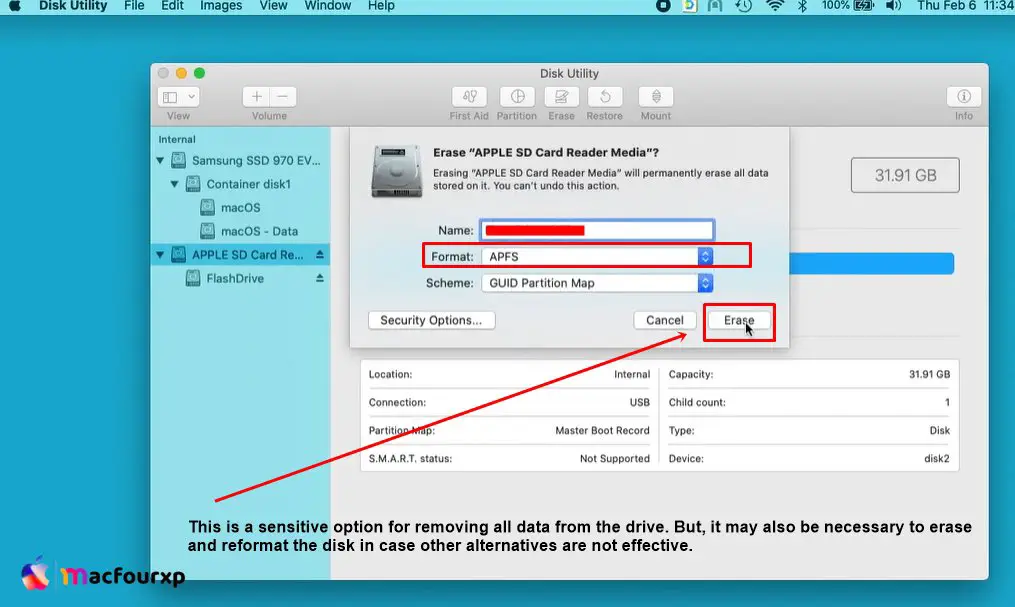
- Open Disk Utility by navigating to Applications->Utilities.
- In the left-hand panel, choose your primary drive.
- Go to Erase tab.
- Give a name to the erased volume.
- Choose the desired file system format (e.g. : APFS)
- Click on the Erase button.
- Use the Time Machine app to back up your Macbook data regularly.
- In case of data loss, think about data recovery software as a last option.
- Keep your disk healthy with routine disk utility checks.
- Make sure your power supply stays stable so you don’t get shut down unexpectedly.
Final Thoughts
You can easily troubleshoot the “Volume Hash Mismatch” by following these steps. If none of these solution work, you should get professional help from Apple Support or an authorized repair shop so they can diagnose and fix the problem.
NEXT READ THIS:
How do I Fix Operation can’t be completed Error “100093”